Before accepting the keys, inspect every filmed panel in clean daylight. Check the edges, surface, openings, and documented coverage before driving away. Small details are much easier to discuss while the installer and vehicle are together.
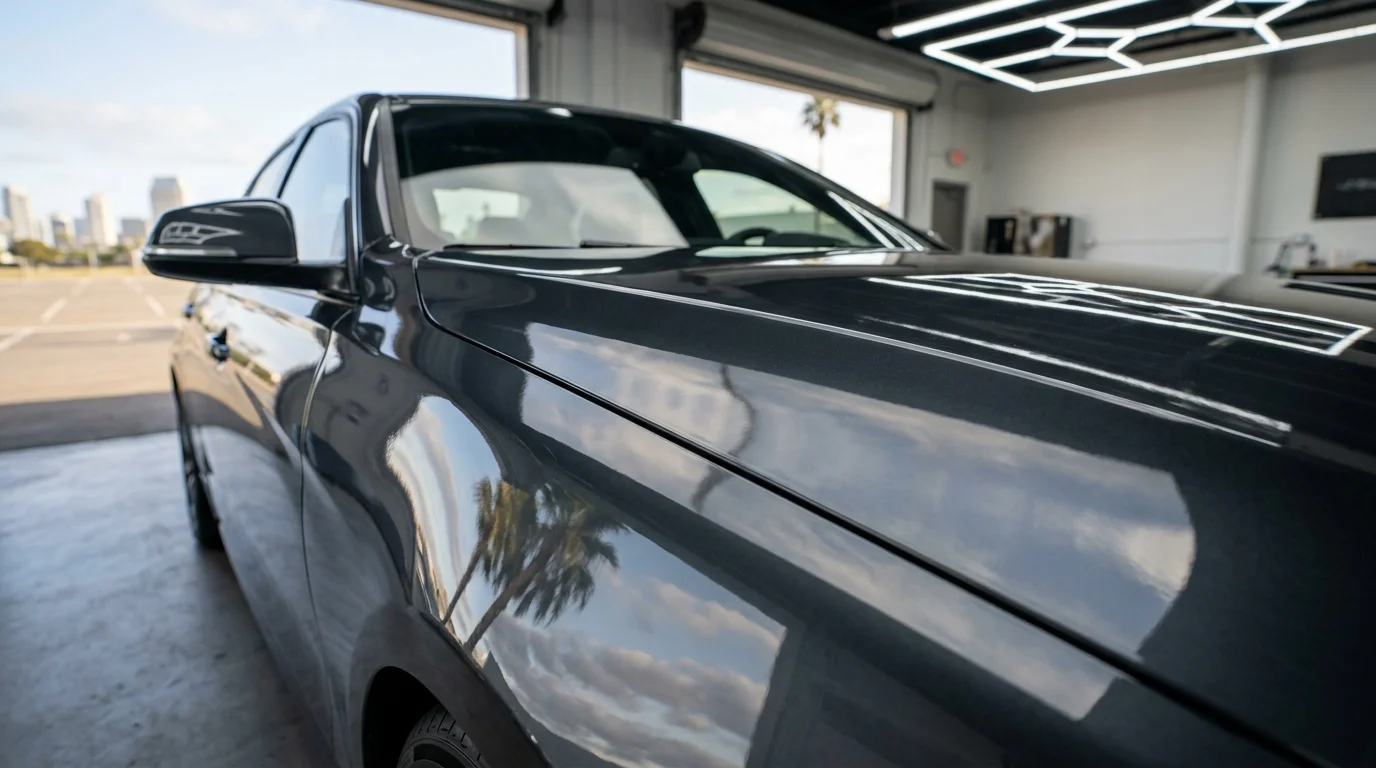
Walk the edges first, in daylight
Bring the written quote or coverage diagram to the inspection. It should identify which panels received paint protection film. Without that reference, it’s easy to mistake an intentional coverage boundary for missing film.
Start at one front corner and walk around the vehicle clockwise. Follow each film edge with your eyes. Look at the hood, fenders, bumper, mirrors, rocker panels, and any other listed areas. View each edge from straight ahead and from a low angle.
San Diego lighting can change the inspection. A coastal marine layer creates flat light that hides fine surface details. Strong inland sunlight can produce glare. Open shade gives you a clear overall view, while angled sunlight can reveal edges and surface texture. Use both when possible.
Look closely at corners and changes in body shape. Those areas ask the film to follow tighter contours. Check whether the boundary looks deliberate and consistent. Note any edge that’s raised, folded, uneven, or visibly collecting material underneath it.
Don’t press a questionable edge down yourself. You could change what the installer needs to examine. Point to it, photograph it, and ask whether it needs correction.
A bright inspection light also helps inside a shop. Move the light across the panel instead of holding it still. Changing the angle can reveal marks that disappear under direct reflection.
Finish by standing several feet away. The film shouldn’t draw your eye through an obvious uneven boundary. Then move close enough to inspect the details. Both views matter.
Wrapped edges vs cut lines and why it matters
A wrapped edge continues around an accessible panel edge. A cut line ends on the visible panel or near its perimeter. Neither approach is automatically correct for every location.
Access, panel shape, nearby trim, and the selected coverage package affect the layout. Some edges can be wrapped cleanly. Others may need a planned cut because the back of the panel isn’t accessible. Bumpers, mirrors, vents, and tight corners often require different choices than a broad hood edge.
Ask the installer to show you which edges were wrapped. Then ask where visible cut lines were part of the planned pattern. This short walkthrough separates intentional work from something that needs another look.
A cut line should appear controlled and follow the intended contour. Look for wandering lines, uneven spacing, sharp changes, or a cut that stops awkwardly. If you see what appears to be a mark in the paint beside the film, don’t rub it. Ask the installer to examine it before you leave.
Wrapped edges deserve the same attention. Check whether the film sits flat around the edge. Look at corners for folds, lifting, or material gathered into a thick ridge. Open only the panels the installer says are ready to operate.
Coverage also matters. A partial hood pattern has a visible boundary by design. A full-front PPF package may cover complete front panels, but the exact included pieces still belong in the written scope. Don’t judge the installation against a different package than the one purchased.
The useful question isn’t whether every edge disappeared. It’s whether each edge matches the agreed coverage and looks intentional.
Silvering, stretch marks, and trapped debris
Inspect the film surface after checking its perimeter. Change your viewing angle slowly. Dark paint, curved bumpers, and reflections from nearby buildings can make surface issues easier to see.
Silvering is a visual term for pale or reflective lines beneath the film. It can look like thin branches, short streaks, or a small web. Similar-looking marks can have different causes, so don’t diagnose them from appearance alone. Circle the location in a photo and ask the installer to inspect it.
Stretch marks may appear as uneven texture or distorted reflections. Check areas where the film follows a tight curve, recessed section, or bumper opening. Compare the reflection across nearby parts of the same panel. A sudden change can help you identify the exact area that needs discussion.
Trapped debris usually has a defined center or raised outline. Inspect from more than one direction because a dust speck on top of the film can resemble material underneath it. Don’t pick at the spot with a fingernail. Ask the installer to determine whether it’s on the surface, beneath the film, or part of the paint below.
One isolated speck doesn’t establish the quality of the entire installation. Location, visibility, and the installer’s written acceptance standard all matter. Ask what can be corrected and what the correction involves.
Take clear photographs before leaving. Include one wide photo showing the panel and one close photo showing the concern. Reflections can make close images confusing, so capture a second angle when possible.
Use plain descriptions during the walkthrough. Say, “I see a reflective line here,” or, “This spot has a raised center.” That gives the installer something specific to examine without guessing at the cause.
Panel gaps, emblems, and sensors
Move next to the places where film meets vehicle hardware. Check panel gaps, emblems, trim, cameras, parking sensor openings, washer nozzles, tow-hook covers, and vents included near the filmed area.
Film shouldn’t create an unexplained bridge between separate panels. Follow the gap around the hood, fenders, bumper sections, doors, and trunk. Compare the left and right sides where the vehicle’s design is symmetrical. Differences aren’t automatically defects, but they’re useful places to ask questions.
Emblems can be handled in several ways. Film may be cut around them, or an emblem may be removed and refitted. The work order should make that choice clear. Check for uneven gaps, loose edges, or small uncovered shapes that don’t match the intended pattern.
Treat sensors and cameras as their own inspection points. Don’t assume the film should cover an opening because it covers the surrounding panel. Ask the installer to identify how each opening was handled. Use the vehicle manual or dealer guidance for questions about your specific driver-assistance equipment.
Look around headlight edges and mirror housings as well. These shapes contain tight corners and multiple seams. The film boundary should match the purchased coverage, not simply stop without explanation.
Check removable covers before leaving. A bumper’s tow-hook cover, for example, is separate from the surrounding surface. Ask how the film was cut around that part and whether removal remains possible.
Keep the inspection visual unless the installer directs otherwise. Don’t pull trim, lift film, or force a panel to test the work. Your goal is to identify visible concerns and confirm the installation matches the written scope.
What is normal in the first week and what is not
Ask for product-specific aftercare instructions before leaving. The installer should explain what appearance changes may occur, how long you should monitor them, and when the vehicle can be washed. Don’t rely on a generic online timeline.
An installer may identify slight haze or small moisture pockets as remaining installation moisture. If so, ask where they are and when they should be checked again. Get that guidance in writing. Film, panel shape, installation method, and local conditions can affect the installer’s directions.
San Diego conditions aren’t identical across the county. An overcast morning near La Jolla differs from a hot afternoon in El Cajon. That’s another reason to follow instructions written for your installation instead of applying a fixed timeline from another vehicle.
Photograph the panels on pickup day. Repeat the photos from similar angles during the installer’s stated observation period. This creates a clear record of whether a spot is changing, staying fixed, or becoming more visible.
Contact the installer if an edge begins lifting, a line spreads, a raised spot remains prominent, or the film shifts around trim. Don’t press, puncture, heat, or trim the area yourself. Let the installer see its original condition.
Ask what would require an immediate return and what can wait for the scheduled follow-up. The answer should be specific to the film and the location.
If you’re still choosing a shop, review our guide to selecting a coating and film installer in San Diego. A clear pickup process should be part of that decision.
Getting the film warranty in writing
Ask for the film warranty before the vehicle leaves the shop. Your installer confirms the film warranty in writing. Paint Shield SD doesn’t set its terms or provide the warranty.
The paperwork should identify the installed product, covered panels, installation date, and party responsible for warranty service. Ask whether product coverage and installer workmanship are separate. If they are, request both documents.
Don’t accept a verbal lifespan promise as a substitute. The applicable term, exclusions, maintenance conditions, and claim steps should appear in the written material. Ask whether the warranty requires registration and who completes it.
Review the coverage map against the vehicle one last time. Make sure partial panels, wrapped edges, trim removal, emblems, and optional pieces match the invoice. Save photographs of the completed installation with those records.
A vehicle factory warranty and a film warranty are different. The federal Magnuson-Moss Warranty Act is the authority for the rule that a manufacturer generally can’t void a warranty merely because an aftermarket product was used, absent a showing that the product caused the failure. The Federal Trade Commission provides consumer information about warranties and aftermarket products. Any specific warranty dispute depends on its own facts.
Ask who to contact if an issue appears later. Record the contact method, required photos, and inspection process. Don’t assume another installer can approve a claim for the original shop.
Good paperwork makes future conversations easier. It tells you what was installed, what the installer promised, and how a concern should be reviewed.
When to call us
Call when you need help finding a vetted, insured local pro for a new PPF installation or an independent visual assessment. Paint Shield SD matches car owners with detailing specialists and doesn’t install film.
Call us at (760) 400-6557 and we’ll connect you with a vetted, insured local pro.